Self Hosting an Email Server in 2025
3 December 2025 (1mo ago)
Setting up and maintaining your own email server can be a daunting task, but with the right tools and configurations, it is achievable. In this guide, I'll walk you through the steps to self-host an email server using modern tools and best practices as of 2025.
Prerequisites
- A domain name (e.g., example.com) and access to its DNS settings
- A VPS or dedicated server with a static IP address
- Basic knowledge of Linux command line and DNS management
- Docker and Dokploy/Coolify installed and running on your server
Step 1: New project setup
- Create a new project in Dokploy/Coolify for your email server.
- Choose a name for your project (e.g., "email-server").
- Create a docker-compose service within the project.
- Use the
rawoption to define your docker-compose configuration.
services:
  stalwart:
    image: stalwartlabs/stalwart:latest
    # container_name: stalwart
    restart: unless-stopped
    ports:
      - "25:25"       # SMTP (Inbound)
      - "587:587"     # SMTP (Submission / Client Sending)
      - "465:465"     # SMTPS (Legacy Secure)
      - "993:993"     # IMAPS (Secure Receive)
      - "143:143"     # IMAP (StartTLS)
      - "4190:4190"   # ManageSieve
    volumes:
      - stalwart_data:/opt/stalwart
    environment:
      - SESSION__RCPT__CATCH_ALL=true
    networks:
      - dokploy-network

volumes:
  stalwart_data:

networks:
  dokploy-network:
    external: true
Step 2: Deploy the service
- Deploy the service in Dokploy/Coolify.
- Ensure that the service is running without errors.
- Check the container logs, it will generate username
adminand a random password for the first time. - Add a domain/subdomain name to this service in Dokploy/Coolify (e.g., mail.example.com) with default port
8080. - Add the DNS records to access the web interface of stalwart at
https://mail.example.com. - Login into your Cloud Provider and open up the necessary TCP ports (25, 465, 587, 143, 993, 4190) in the firewall/security group settings.
Step 3: Configure Stalwart
-
Access the Stalwart web interface at
https://mail.example.com. -
Log in using the username
adminand the generated password from the logs. -
Change the admin password immediately after logging in.
-
Edit the network settings at Settings > Network > Edit, add the hostname (eg. mail.example.com)
-
Add the domain
example.comin the Manage > Directory > Domains. Add the DNS records provided by Stalwart to your domain's DNS settings. -
In the TLS > ACME provider section, create the ACME provider to automatically manage TLS certificates.
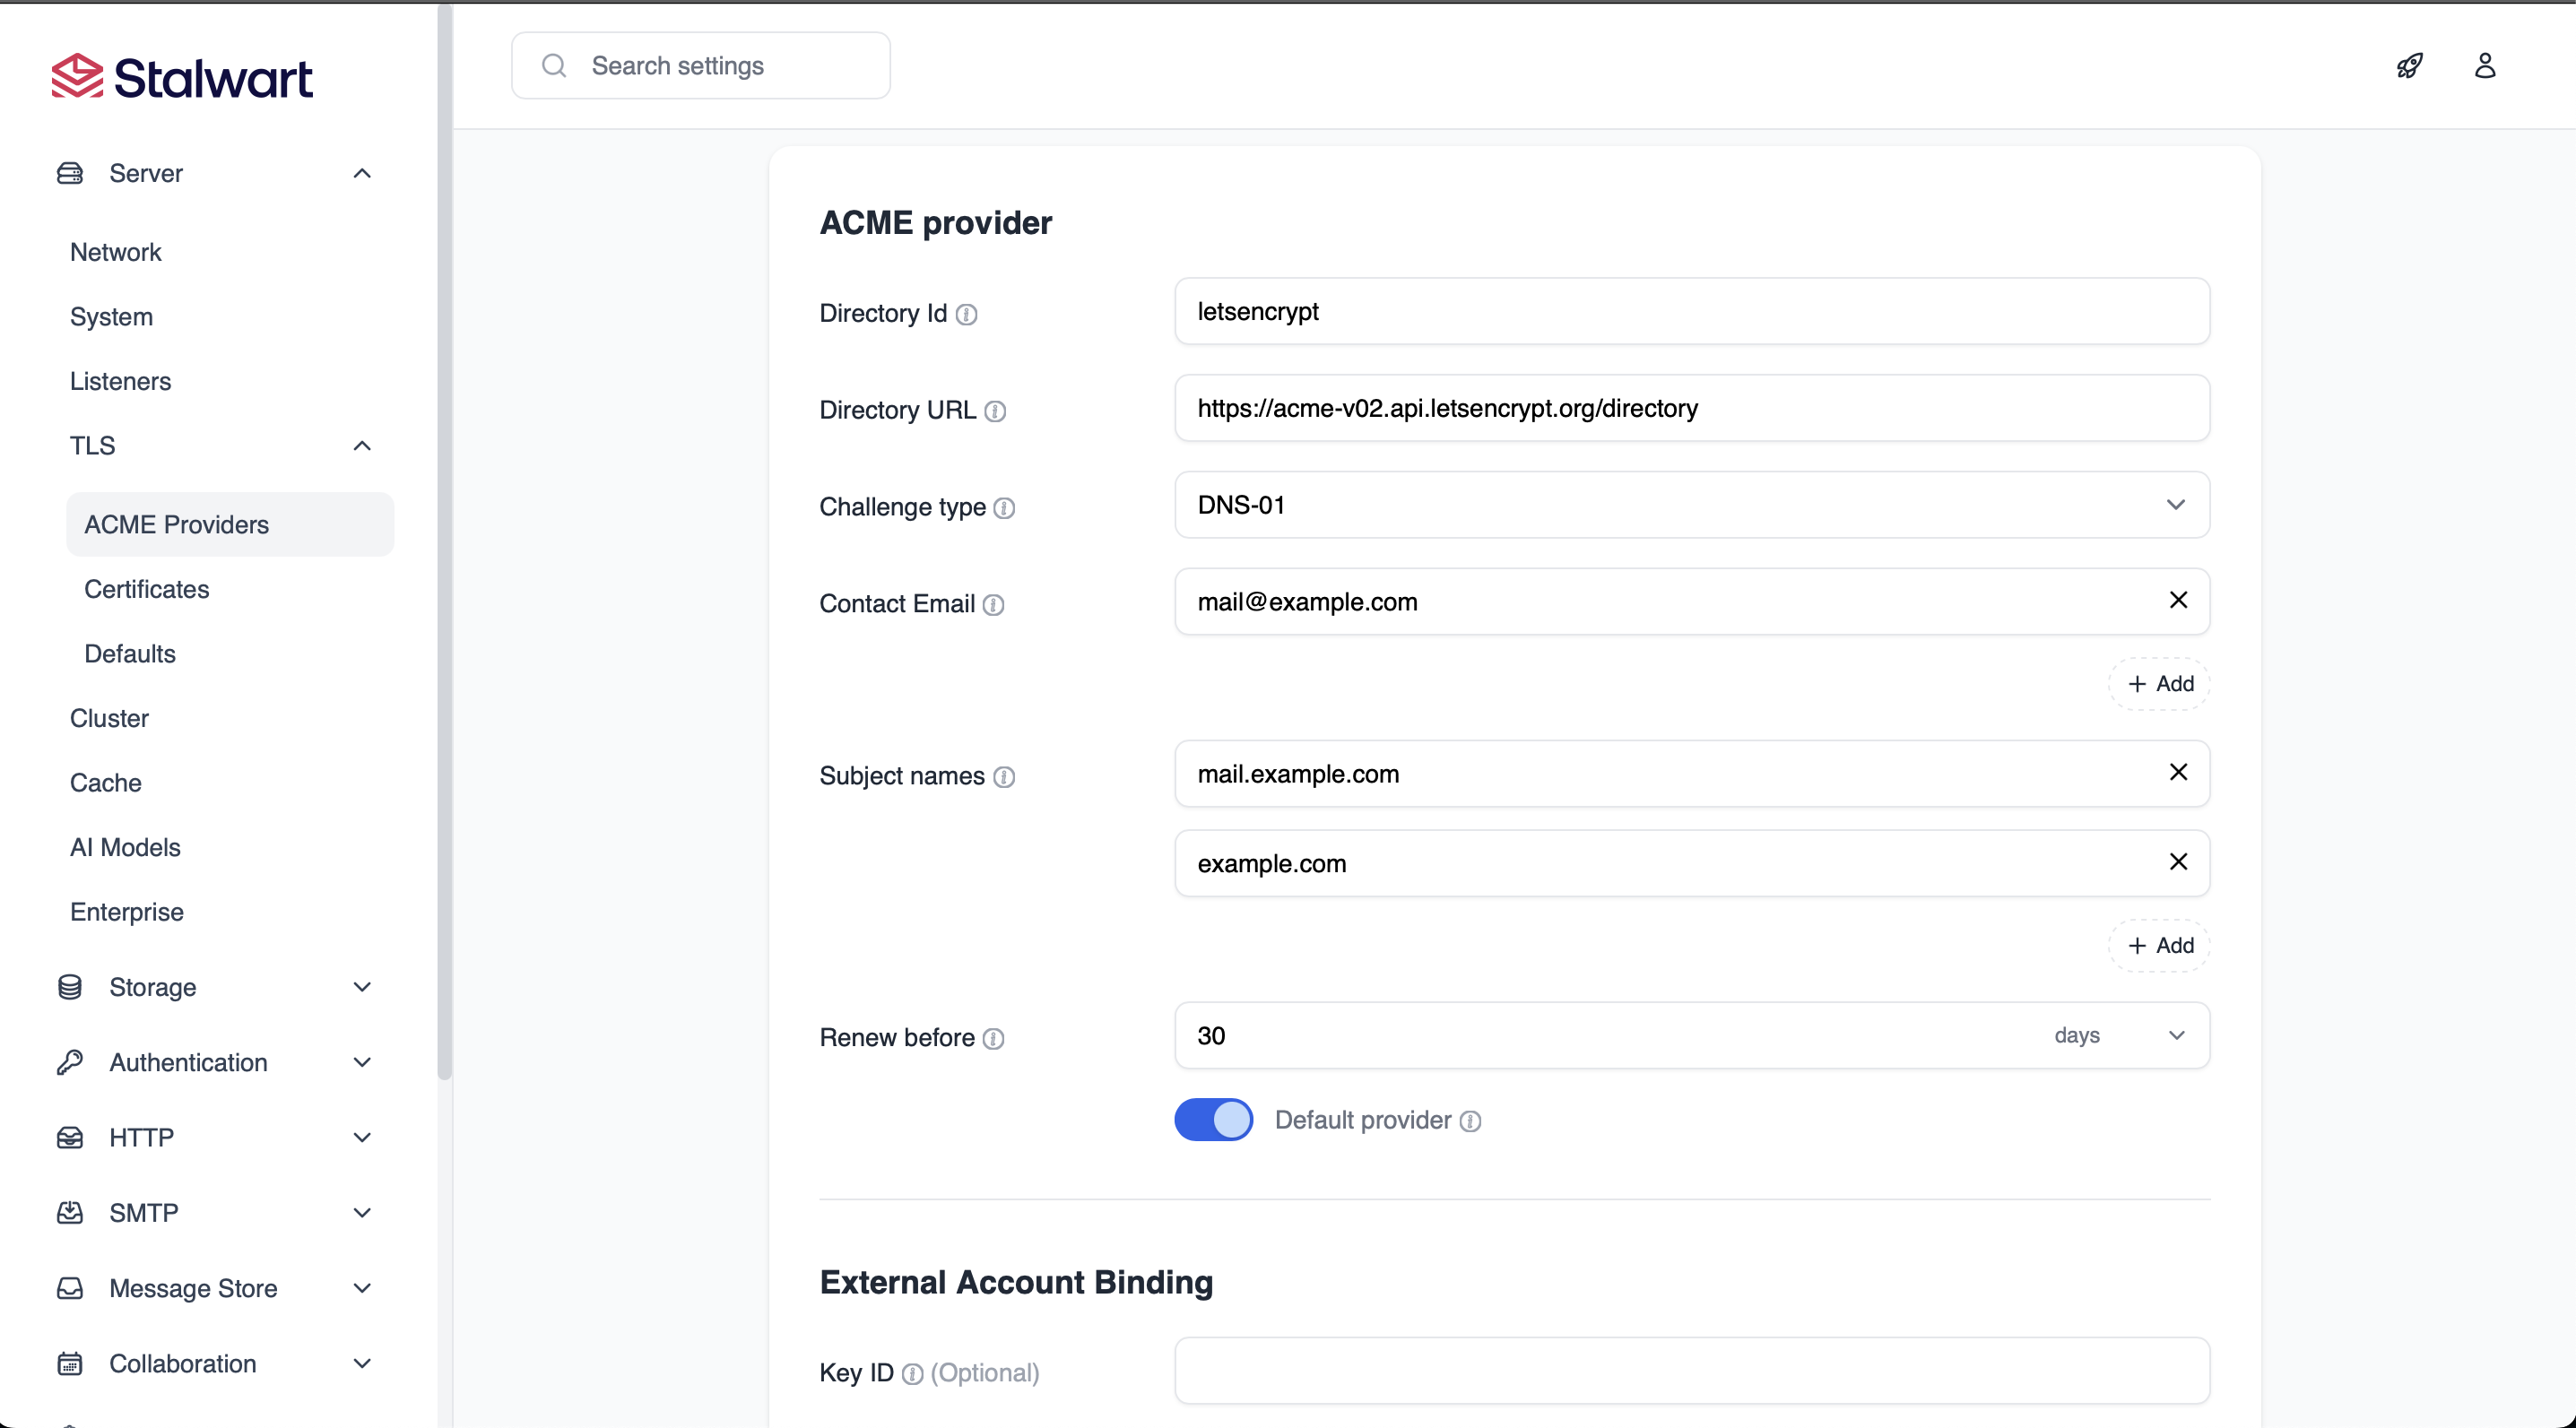
-
Set up DNS settings (DNS Provider) and secret token/api key for automatic DNS verification. For cloudflare, you can use the Cloudflare API token with DNS edit permissions.
-
Create a new email user in Manage > Directory > Accounts. Add aliases
*@example.comor@example.comto enable catch-all functionality for the user. Add authentication, permission and quota settings as per your requirements. -
Configure the relay service in Settings > SMTP > Routing. Add new route with type
Relay Hostand provide the SMTP server details of your existing email provider (e.g., Oracle, Brevo, Amazon SES etc.) along with authentication details. This will help in sending emails through a trusted relay server to avoid deliverability issues. -
Set up strategy to use this relay host.
